Sewing is a valuable skill that offers endless possibilities. Whether you’re interested in creating your own wardrobe, crafting home décor, or simply fixing garments, sewing empowers you to be resourceful and creative. For beginners, learning to sew can seem overwhelming due to the variety of techniques, tools, and fabrics involved. However, with the right guidance and a step-by-step approach, anyone can learn the basics of sewing and progress toward more complex projects.
In this extensive guide, we’ll cover everything you need to know to start your sewing journey with confidence.
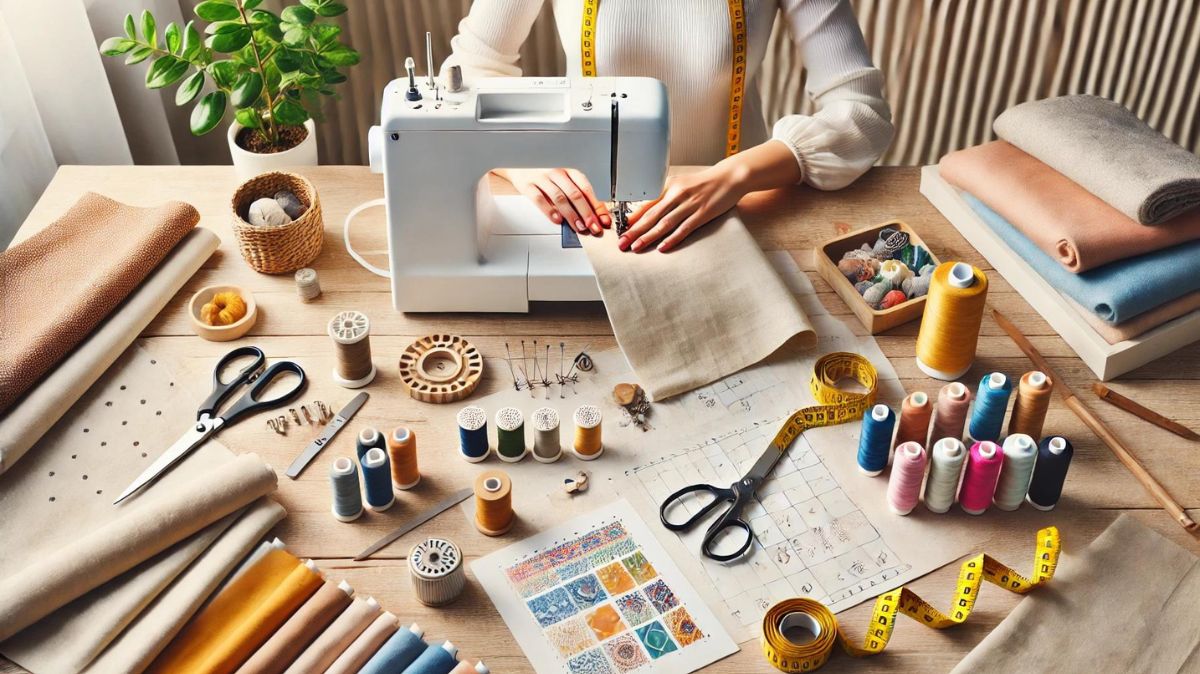
What You'll Learn in This Guide
Understanding the Sewing Tools and Supplies You Need
Before you begin your first project, it’s essential to know the tools of the trade. Sewing requires a combination of essential tools and materials, all of which are necessary for achieving the best results. Below, we’ll explore both the basic and advanced tools you’ll need as a beginner.
Basic Sewing Tools
Sewing Machine:
Your sewing machine will be the primary tool for most of your projects. A beginner sewing machine should have basic functions like straight stitches and zigzag stitches. If you’re unsure which machine to start with, brands like Brother, Singer, and Janome offer machines tailored to beginners, typically within a budget-friendly range.Hand-Sewing Needles:
Even with a sewing machine, hand-sewing needles are essential for small repairs or delicate work. Keep a variety of needle sizes handy. Size 8-10 needles are great for general sewing, while smaller needles work better for delicate fabrics.Thread:
Thread comes in various types, such as cotton, polyester, nylon, and silk. For beginners, all-purpose polyester thread is ideal as it works on a wide range of fabrics. As you advance, you can experiment with threads designed for specific fabrics, such as cotton thread for quilting or nylon thread for stretchy materials.Pins and Pin Cushion:
Pins hold fabric in place while you sew. Opt for glass-headed or plastic-headed pins for easy handling. A pin cushion or magnetic pin holder will keep your workspace organized and reduce the risk of losing pins.Fabric Scissors:
A sharp pair of scissors is essential for cutting fabric smoothly. Avoid using your fabric scissors for paper or other materials, as this will dull them quickly. Specialized tools like pinking shears can also be used to prevent fabric edges from fraying.Seam Ripper:
Mistakes are common when learning to sew, and that’s where a seam ripper comes in handy. This small tool allows you to remove unwanted stitches without damaging the fabric.Measuring Tape:
A flexible measuring tape is essential for taking body measurements, checking fabric dimensions, and ensuring accurate cuts.Marking Tools:
Fabric markers, chalk, and tailor’s pencils are used to mark fabric for cutting, sewing lines, or button placement. Make sure the markings are temporary and can be easily removed with water or washing.Iron and Ironing Board:
Pressing fabric is key to professional-looking results. An iron helps to set seams, remove wrinkles, and ensure smooth fabric pieces before sewing. Some sewing projects also require fabric to be pressed at various stages.
Advanced Sewing Tools (Optional)
Rotary Cutter and Cutting Mat:
A rotary cutter is a rolling blade used to cut fabric. Paired with a cutting mat and a ruler, it allows for precise, straight cuts, especially when cutting multiple layers of fabric at once.Sewing Machine Feet:
Various presser feet can be attached to your machine for specific functions. For example, a zipper foot is necessary for installing zippers, while a walking foot helps feed fabric evenly through the machine for quilting or working with tricky fabrics.Fabric Clips:
These clips serve as an alternative to pins when working with heavy fabrics or materials that may be damaged by pins, like vinyl.Dressmaker’s Dummy (Mannequin):
If you plan to make clothing, a dressmaker’s dummy or mannequin can help with fitting and draping.
Choosing the Right Fabric for Your First Sewing Project
The fabric you choose can make or break your sewing project, especially as a beginner. Some fabrics are easy to handle, while others are slippery, stretchy, or prone to fraying, which can be challenging for new sewists. Below is an overview of the best fabrics to start with and those to avoid initially.
Best Fabrics for Beginners
Cotton:
Cotton is a beginner’s best friend. It’s durable, easy to sew, and widely available in various colors and patterns. Cotton works well for a variety of projects, including clothing, quilting, and home décor. Additionally, it’s machine-washable and easy to care for.Linen:
Linen is another natural fiber that’s easy to work with. It’s breathable, has a bit of texture, and is suitable for garments like summer dresses, blouses, and casual pants. Linen can wrinkle easily, so it’s essential to press it before cutting and sewing.Flannel:
Soft and cozy, flannel is great for cold-weather projects like pajamas, blankets, and shirts. It’s thick and stable, making it easy to handle for beginners. Flannel fabrics also tend to resist fraying, which is a bonus when sewing seams.Felt:
Unlike woven fabrics, felt does not fray, making it ideal for beginners. It’s often used for crafting, making small accessories, or appliqué. Felt comes in synthetic and wool varieties, with wool being more durable and softer than its synthetic counterpart.Broadcloth:
Broadcloth is a type of tightly woven cotton or cotton-blend fabric that works well for clothing, quilting, and other sewing projects. It’s typically lightweight and easy to press, making it an excellent choice for beginners learning garment construction.
Fabrics to Avoid for Beginners
Silk and Satin:
These luxurious fabrics are slippery and difficult to control. They require advanced skills and special tools to prevent puckering and fraying.Knit Fabrics:
While knit fabrics like jersey are comfortable to wear, they stretch and require a sewing machine with a stretch stitch or a serger to sew properly.Chiffon and Organza:
Lightweight and delicate, chiffon and organza tend to shift while sewing, making it difficult for beginners to manage straight seams and consistent stitches.Leather and Vinyl:
These materials are thick and can be tough on both your machine and needles. They require specialty tools and needles designed for heavyweight fabrics.
How to Choose Fabric for Your Project
When selecting fabric, consider the following factors:
- Pattern Requirements: Sewing patterns often specify the type of fabric best suited for the project. Follow these recommendations for best results.
- Stretch: If you’re sewing a garment, consider whether the fabric needs to have stretch (like knit) or if it should be more structured (like cotton or linen).
- Color and Design: For your first projects, choose solid colors or simple patterns like stripes and polka dots. These are easier to align and manage than complex patterns like florals or plaids.
- Prewashing: Some fabrics shrink when washed, so always prewash your fabric before cutting to prevent post-sewing shrinkage.
For additional guidance on fabric selection, websites like Fabric.com offer detailed descriptions of fabric types and recommended uses.
How to Read a Sewing Pattern
If you’ve ever looked at a sewing pattern for the first time, it may seem like an entirely new language. But once you understand the components, reading a pattern becomes much easier. Sewing patterns are vital for creating garments, accessories, and even home décor items with precision.
Parts of a Sewing Pattern
The Envelope:
Sewing patterns come in envelopes that display the finished project images, a size chart, fabric recommendations, and a list of required materials. The back of the envelope often shows multiple views of the project, such as different sleeve lengths or necklines.Pattern Pieces:
Inside the envelope, you’ll find tissue paper pattern pieces that correspond to different parts of the project. For example, a skirt pattern may include pieces for the front, back, waistband, and pockets. Each piece is labeled and contains symbols and lines that help guide you in cutting and assembling the fabric.Instructions:
Each pattern includes a detailed instruction sheet with step-by-step guidelines. The instructions will walk you through how to cut out the fabric, assemble the pieces, and sew them together.
How to Choose the Right Size
Unlike ready-to-wear clothing, sewing patterns are based on body measurements. To find the right size:
- Take your measurements for bust, waist, and hips.
- Compare your measurements to the pattern’s size chart.
- Always choose the size based on your largest measurement, as you can adjust other areas later.
Most patterns include instructions for making adjustments to fit your body type, such as lengthening or shortening hems or adjusting for a fuller bust.
Symbols and Terms to Know
Grainline:
A line marked on pattern pieces to indicate the direction in which the fabric should be cut. Align the grainline with the fabric’s grain for best results.Notches:
Small triangles or lines on the edge of pattern pieces that help match seams accurately when assembling fabric.Seam Allowance:
The area between the stitching line and the fabric’s edge. Patterns typically include a standard seam allowance of 5/8 inch, but this can vary.Darts and Pleats:
Darts shape the fabric to fit the body, often found on garments like dresses and shirts. Pleats are folds in fabric that add fullness or texture.
For more in-depth pattern tutorials, consider visiting sewing blogs or online courses on platforms like Craftsy.
Mastering Basic Hand-Sewing Techniques
While sewing machines make most projects quicker and easier, hand-sewing is an essential skill for making repairs, finishing small details, or working with delicate fabrics. Here, we’ll explore the most common hand-sewing stitches every beginner should know.
Essential Hand-Sewing Stitches
Running Stitch:
This simple stitch is used for basting, gathering fabric, and creating seams. To perform a running stitch, pass the needle in and out of the fabric at even intervals. The smaller and more consistent your stitches, the stronger the seam will be.Backstitch:
The backstitch is one of the strongest hand-sewing stitches and is perfect for seams that need extra durability. Begin by making one stitch forward, then bring the needle back to the end of the previous stitch before moving forward again. This creates a solid, overlapping line of stitching.Whipstitch:
This stitch is used to join two fabric edges together, such as when sewing a seam or hemming. To create a whipstitch, pass the needle over the edge of the fabric at a consistent angle, forming diagonal stitches.Slip Stitch (Invisible Stitch):
The slip stitch is often used to sew hems invisibly or to close the openings of stuffed items like pillows or plush toys. The stitch is made by alternating between sewing into the fold of one fabric piece and catching a small bit of fabric on the other side, resulting in a nearly invisible seam.Blanket Stitch:
This stitch is both decorative and functional. It’s often used on the edges of thick fabrics like fleece or felt to prevent fraying while adding a decorative border.
Tips for Hand-Sewing
Use the Right Needle Size:
Thicker fabrics like denim require a sturdier needle, while fine fabrics need delicate needles.Thread Length:
Avoid using long pieces of thread, as they are more likely to knot. Stick to a thread length of about 18 inches for ease of use.Knots:
Always tie a knot at the end of your thread to prevent it from pulling through the fabric. Double knots can provide extra security.Practice Makes Perfect:
Like any skill, hand-sewing takes practice. Start with simple projects like hemming or sewing on buttons, and gradually work your way up to more complex tasks.
Learning to Sew with a Machine: A Comprehensive Guide for Beginners
Using a sewing machine can be intimidating for beginners, but once you understand the basics, it will significantly speed up your sewing projects. Below is a step-by-step guide to help you get started with machine sewing.
Step-by-Step Guide to Using a Sewing Machine
Get Familiar with Your Machine
Before you begin sewing, familiarize yourself with the parts of your machine. Common features include:- Presser Foot: Holds the fabric in place as you sew.
- Bobbin and Bobbin Case: The bobbin holds the bottom thread and sits underneath the needle plate.
- Stitch Selector: Allows you to choose different types of stitches.
- Tension Dial: Controls the tension of the upper thread.
Consult your sewing machine’s manual for detailed information on the features specific to your model.
Winding the Bobbin
Most sewing machines have a bobbin winder on the top or side. To wind the bobbin:- Place a spool of thread on the spool pin.
- Run the thread through the thread guide and tension discs.
- Wind the thread around the bobbin several times and place it on the bobbin winder.
- Press the foot pedal to start winding the bobbin evenly.
Threading the Machine
Threading the sewing machine properly is crucial for successful stitching. Follow the instructions in your manual for your specific machine, but the general process is:- Place the spool of thread on the spool pin.
- Guide the thread through the tension discs and take-up lever.
- Pass the thread through the needle from front to back.
Loading the Bobbin
Insert the wound bobbin into the bobbin case, ensuring it’s placed correctly (check your machine’s manual for the correct orientation). Pull the bobbin thread through the slot in the needle plate.Choosing a Stitch
For most beginner projects, the straight stitch will be your go-to. Set the stitch length to 2.5 mm for regular seams. If you’re sewing stretchy fabrics, a zigzag stitch may be more appropriate to allow for flexibility in the seam.Start Sewing
Place your fabric under the presser foot, lower the presser foot lever, and press the foot pedal gently to start sewing. Use your hands to guide the fabric, but don’t pull or push it through the machine—let the feed dogs do the work.
Common Sewing Machine Stitches
Straight Stitch:
The most basic and frequently used stitch. It’s ideal for seams and topstitching on most fabrics.Zigzag Stitch:
A versatile stitch used for finishing edges, sewing stretch fabrics, and decorative work.Buttonhole Stitch:
Many sewing machines have an automatic buttonhole function. This stitch is essential for creating uniform buttonholes in garments.Overcast Stitch:
This stitch is used to prevent fabric edges from fraying. It’s similar to the stitch produced by a serger but can be done on most basic sewing machines.
Tips for Machine Sewing Success
Start Slow:
As a beginner, it’s important to sew at a slow pace to maintain control. You can increase speed as you become more comfortable with the machine.Check Tension Settings:
If your stitches are too loose or too tight, adjust the tension dial. The perfect tension will create evenly spaced stitches on both the front and back of your fabric.Keep the Machine Clean:
Lint and dust can build up in your machine, especially around the bobbin case. Regularly clean your sewing machine as per the manufacturer’s instructions to prevent jams and keep it running smoothly.
How to Hem Fabric Like a Professional
Hemming is a technique used to finish the raw edges of fabric, creating a neat and clean edge. Whether you’re sewing garments, curtains, or table linens, knowing how to hem properly is crucial. Here’s a step-by-step guide to hemming fabric.
Types of Hems
Double Fold Hem:
This is the most common hem used for clothing. To create a double fold hem, fold the fabric edge up by ¼ inch, press it with an iron, then fold it up again by ¼ to ½ inch, press, and sew along the folded edge.Blind Hem:
A blind hem is often used for dress pants and skirts when you don’t want the stitches to be visible from the outside. To sew a blind hem, fold the fabric up to create the hem, then fold it back, leaving just a small edge exposed. Sew along the fold using a blind hem stitch, catching only a tiny bit of the outer fabric.Rolled Hem:
This narrow hem is often used on lightweight fabrics like chiffon or silk. It’s sewn very close to the edge and is ideal for scarves and formalwear.Serged Hem:
If you have a serger, you can create a serged hem by trimming the raw edge of the fabric and sewing a serged seam simultaneously. This is perfect for finishing seams on knits and other stretchy fabrics.
Steps to Hem Fabric
Measure and Mark:
Put on the garment or drape the fabric to the desired length. Use a measuring tape or ruler to mark the hemline with fabric chalk or a washable fabric marker.Press the Hem:
Fold the fabric along the hemline and press it with an iron. Pressing helps to create crisp folds, which will make sewing the hem easier and neater.Pin the Hem:
Pin the folded edge of the fabric to secure the hem in place while you sew. Ensure the pins are placed perpendicular to the edge of the fabric so they are easy to remove as you sew.Sew the Hem:
Use your sewing machine or hand-sew the hem, depending on the technique you are using. For double fold hems, sew close to the folded edge. For blind hems, use the appropriate stitch and sew slowly to ensure accuracy.Press Again:
After sewing the hem, press it once more with an iron to set the stitches and create a clean finish.
Hemming Tips
Use a Measuring Gauge:
Hemming requires precision, and a measuring gauge can help ensure your hem is even all the way around.Press, Don’t Skip:
Pressing fabric before and after sewing helps to achieve a more professional look, making the hem sit flat and neat.Practice Blind Hems:
Blind hems can be tricky at first, so practice on scrap fabric before hemming a final project.
For more detailed tutorials on hemming techniques, check out sewing blogs or video guides on Sew Guide.
Understanding Seam Allowances and Their Importance
Seam allowances are the extra space between the stitching line and the edge of the fabric. This area is crucial for the construction and durability of your sewing projects.
What is a Seam Allowance?
A seam allowance is the area of fabric between the stitching and the raw edge. When you sew a seam, the seam allowance allows room for the fabric to join together without fraying or pulling apart.
Standard Seam Allowances
5/8 Inch:
The most common seam allowance for garment sewing. This size provides enough fabric to handle adjustments if needed.¼ Inch:
Often used for quilting and sewing small crafts. The smaller seam allowance is ideal for precision work but doesn’t allow much room for adjustments.½ Inch:
This seam allowance is frequently used for home décor projects and larger seams.
How to Sew Consistent Seam Allowances
To ensure your seams are even, use the seam guides on your sewing machine’s needle plate. Most machines have lines marked at ¼ inch, ½ inch, and 5/8 inch to guide you as you sew.
Seam Finishing Techniques
Once your seams are sewn, it’s important to finish them to prevent fraying and ensure they lie flat. Here are a few common seam finishing methods:
Zigzag Stitch:
A zigzag stitch along the raw edge of the seam helps prevent fraying. This is the easiest way to finish seams without special tools.French Seams:
French seams encase the raw edges inside the seam itself, making them perfect for delicate fabrics or garments like blouses. To sew a French seam, stitch the fabric wrong sides together with a narrow seam, then fold the fabric so the right sides are together and sew another seam that encases the first.Serged Seams:
If you have a serger, it can trim and finish the raw edges of your seam in one step. Serged seams are particularly useful for knits and fabrics that fray easily.
Tips for Managing Seam Allowances
Clip Curves:
For curved seams, clip small notches into the seam allowance to allow the fabric to lay flat. This is especially important when sewing sleeves or necklines.Press Seams Open:
Pressing your seams open with an iron helps them lie flat and reduces bulk. Always press seams before finishing them for the best results.
Beginner Sewing Projects to Boost Your Confidence
Now that you’ve learned the basics of sewing, it’s time to put those skills into practice. Below are a few beginner-friendly sewing projects that will help you gain confidence and build upon your knowledge.
1. Pillowcase
A pillowcase is one of the simplest projects to start with, as it involves sewing straight seams and minimal fabric manipulation.
Materials:
- 1 yard of cotton fabric
- Matching thread
- Sewing machine
- Measuring tape
- Pins
Instructions:
- Cut two pieces of fabric measuring 20 x 30 inches each.
- Place the pieces right sides together and pin around the edges.
- Sew around three edges with a ½ inch seam allowance, leaving one short edge open.
- Press the seams flat and finish the raw edges with a zigzag stitch or pinking shears.
- Fold the open edge twice to create a hem, and sew it down.
2. Tote Bag
A simple tote bag is another great beginner project that teaches you to work with seams, hemming, and fabric handling.
Materials:
- 1 yard of canvas or cotton fabric
- ½ yard of webbing for handles
- Matching thread
- Scissors
- Pins
Instructions:
- Cut two pieces of fabric measuring 16 x 18 inches each for the bag body, and two pieces measuring 4 x 16 inches for the handles.
- Pin and sew the sides and bottom of the bag with a ½ inch seam allowance.
- Fold and press the top edge of the bag twice to create a hem, and sew around the hem to secure it.
- Sew the handles onto the bag, ensuring they are evenly spaced.
3. Simple Elastic Skirt
An elastic-waist skirt is a perfect beginner garment project. It’s simple to construct and allows you to practice working with elastic.
Materials:
- 1-1.5 yards of fabric (cotton or linen)
- 1-inch wide elastic
- Matching thread
- Safety pin
Instructions:
- Measure your waist and cut a piece of fabric that is twice your waist measurement and as long as you want the skirt to be.
- Sew the side seam of the skirt with a ½ inch seam allowance.
- Fold the top edge of the fabric over by 1 inch to create a casing for the elastic and sew, leaving a small opening to insert the elastic.
- Insert the elastic into the casing using a safety pin to thread it through. Sew the ends of the elastic together and close the casing.
- Hem the bottom edge of the skirt by folding it twice and sewing along the fold.
For more ideas, check out sites like AllFreeSewing which offer free beginner sewing patterns.
Sewing Safety Tips
Safety should always be a priority when sewing, especially when using sharp tools and fast-moving machines. Follow these essential safety guidelines to avoid accidents.
Safety Tips for Hand-Sewing
Use Thimbles:
When hand-sewing thick fabrics or working with tough materials, use a thimble to protect your fingers from needle pricks.Keep Needles and Pins Organized:
Always store needles and pins in a pin cushion or a magnetic tray. Loose pins on your work surface can easily cause injuries.Watch Your Posture:
Long periods of hand-sewing can cause strain on your hands, wrists, and back. Sit in a comfortable chair with good posture, and take breaks to stretch.
Sewing Machine Safety Tips
Unplug When Not in Use:
Always unplug your sewing machine when changing needles or cleaning the machine. This reduces the risk of accidental starts.Keep Fingers Clear:
Keep your fingers away from the needle while sewing. Use tools like a stiletto to guide the fabric if needed.Mind the Foot Pedal:
Place the foot pedal in a comfortable position and ensure it’s secure to avoid sudden machine acceleration.Avoid Distractions:
Sewing requires concentration. Avoid distractions like talking on the phone or watching television while operating the machine.
Troubleshooting Common Sewing Machine Issues
Even the best sewing machines occasionally run into problems. Below are some common sewing machine issues and how to troubleshoot them.
Issue: Thread Keeps Breaking
If your thread is constantly breaking, try the following fixes:
- Check the Thread Tension:
Thread tension that is too tight can cause the thread to snap. Loosen the tension dial slightly and test again. - Use Quality Thread:
Cheap or old thread can easily break. Always use high-quality thread. - Re-thread the Machine:
Incorrect threading can cause tension issues and breakage. Re-thread the top thread and bobbin, ensuring everything is properly in place.
Issue: Skipped Stitches
Skipped stitches can ruin a seam and weaken the fabric. Here’s how to fix it:
- Use the Right Needle:
A dull or wrong-sized needle can cause skipped stitches. Replace the needle with a new one that’s appropriate for your fabric. - Adjust the Presser Foot:
Ensure the presser foot is down and providing enough pressure on the fabric.
Issue: Bobbin Thread Tangling
Tangled bobbin thread can cause messy seams and jams. To fix this:
- Rewind the Bobbin:
A loosely wound bobbin can lead to tangles. Rewind the bobbin evenly and reinsert it properly. - Clean the Bobbin Area:
Lint and dust can accumulate in the bobbin area, causing tangles. Clean the bobbin case regularly.
Simple Clothing Repairs Every Beginner Should Know
One of the most practical uses of sewing is repairing clothing. Knowing how to fix basic issues like loose buttons, broken zippers, or torn seams can save you money and extend the life of your garments.
Replacing a Button
Replacing a button is one of the easiest clothing repairs. All you need is a needle, thread, and a matching button.
- Thread your needle with a double strand of thread and knot the end.
- Position the button where the original one was located and sew it in place by passing the needle through the fabric and button holes multiple times.
- Secure the button by tying a knot on the back of the fabric.
Fixing a Torn Seam
Torn seams are common, but easy to fix with a few simple stitches.
- Turn the garment inside out to expose the seam.
- Use a running stitch or backstitch to sew along the original seam line, ensuring that the fabric edges are aligned.
- Tie off the thread securely and press the seam to finish.
Repairing a Hem
If a hem has come undone, it can be quickly repaired with a hand-sewing needle.
- Fold the hem back into place and pin it securely.
- Use a slip stitch or blind hem stitch to sew the hem, ensuring the stitches are invisible from the outside.
- Press the hem flat with an iron.
Replacing a Zipper
Replacing a zipper requires more advanced skills, but with practice, it can be done at home. Follow these basic steps:
- Use a seam ripper to carefully remove the old zipper.
- Pin the new zipper in place, ensuring it’s aligned with the fabric edges.
- Sew the zipper using a zipper foot on your sewing machine, stitching close to the zipper teeth.
Organizing Your Sewing Space for Maximum Efficiency
A well-organized sewing space can greatly enhance your productivity and enjoyment. Below are some tips for setting up and organizing your sewing area.
Create a Dedicated Sewing Area
Whether it’s a corner of a room or a full sewing studio, having a dedicated space for sewing helps keep tools and materials in order. Consider using a small desk or sewing table with enough room for your sewing machine, fabric, and tools.
Organize Your Tools
Use Pegboards:
Hang scissors, rotary cutters, rulers, and other tools on a pegboard for easy access.Storage Bins and Drawers:
Keep small items like buttons, thread, and needles organized in labeled bins or drawer organizers.Fabric Storage:
Fold fabric neatly and store it on shelves or in bins. Keep it organized by type or color for easy access.
Lighting and Ergonomics
Good lighting is crucial for sewing, especially when working on intricate details. Place a desk lamp or overhead light directly above your sewing area. Additionally, ensure your chair and table are at comfortable heights to avoid strain.
Manage Scrap Fabric
Scrap fabric can pile up quickly. Dedicate a bin or basket for scraps that can be used in future projects. Larger scraps can be used for patchwork quilts, while smaller pieces can be used for craft projects.
For inspiration on organizing your sewing space, explore sites like Sewing Room Ideas.
Final Thoughts
Sewing is a rewarding and practical skill that anyone can learn. With the right tools, materials, and techniques, you can create beautiful and functional projects. Whether you’re just starting out or looking to refine your skills, this guide covers all the essentials to get you started on the right path. Keep practicing, and before you know it, you’ll be tackling more advanced projects with confidence.
FAQs
How long does it take to learn sewing?
Learning the basics can take a few weeks, but mastering more complex techniques requires consistent practice over time.Can I sew without a sewing machine?
Yes, many small projects and repairs can be done by hand, but a machine is essential for larger projects and garments.What is the easiest fabric to sew for beginners?
Cotton is the easiest fabric for beginners because it’s stable, durable, and widely available.Do I need an expensive sewing machine?
No, many beginner-friendly machines are affordable and come with the basic functions you need to start sewing.What should my first sewing project be?
A pillowcase or tote bag is an excellent first project, as they are simple and teach fundamental sewing skills.How do I avoid making mistakes in sewing?
Take your time, read instructions carefully, and always test on scrap fabric before sewing your final project.
Author

An aspiring business leader, I am working towards my dream of graduating from Stanford University with a degree in Business Management. Passionate about sharing knowledge, I strive to empower others through education and collaborative learning.
View all posts